Setting up the ADC VPN under Windows XP
Close all other windows before proceeding.
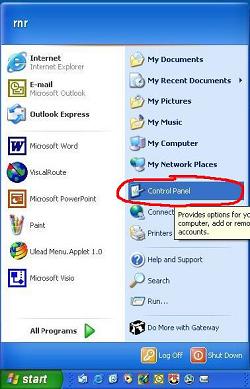
Click on Start / Control Panel.
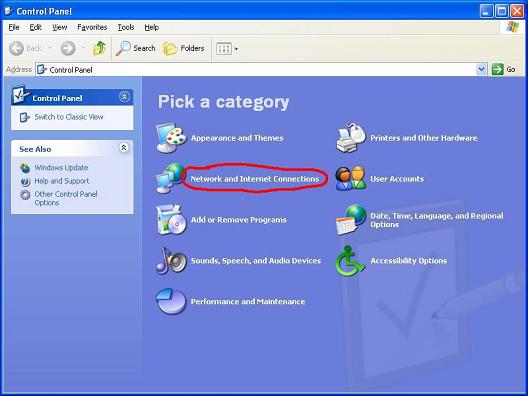
If the Classic View (shown below) appears, click on Switch to Category View. If you are already in Category View, you can skip this step.

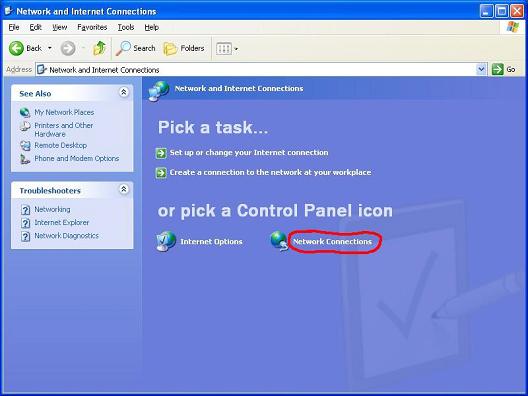
Click on Network and Internet Connections.
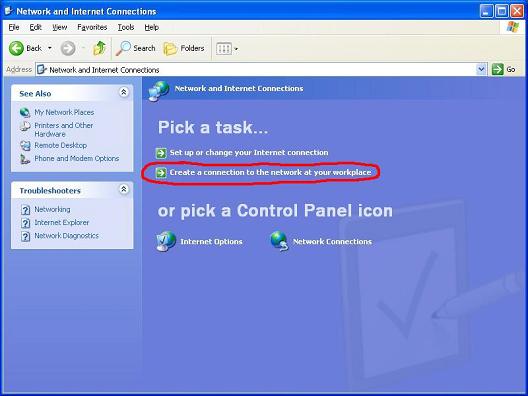
Select Create a connection to the network at your workplace.
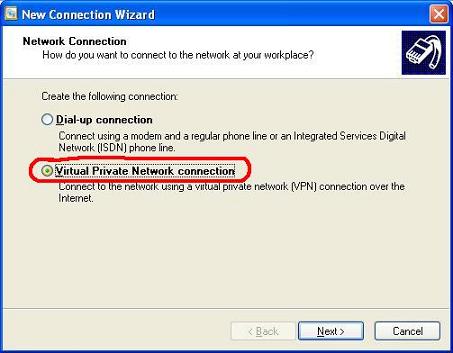
Pick Virtual Private Network connection and click Next.
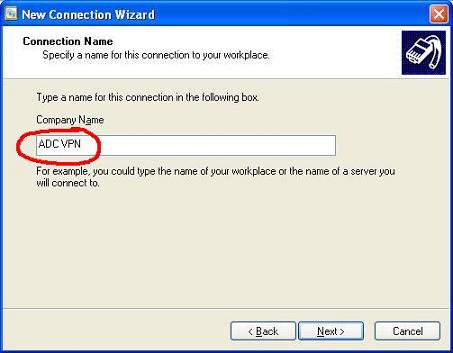
Enter ADC VPN as the Company Name and click Next.
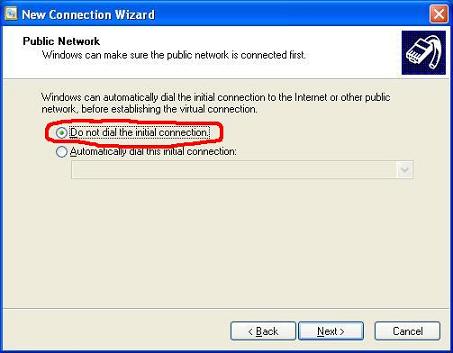
If the Public Network screen appears, select Do not dial the initial connection and click Next. This screen may not always appear.
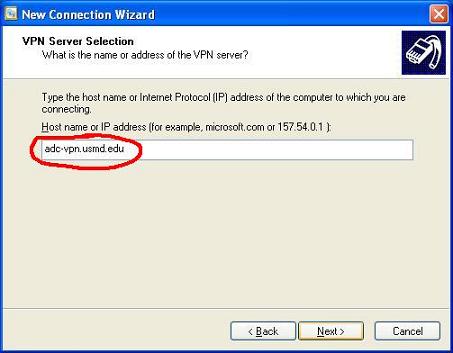
Enter adc-vpn.usmd.edu as the Host name, and click Next.
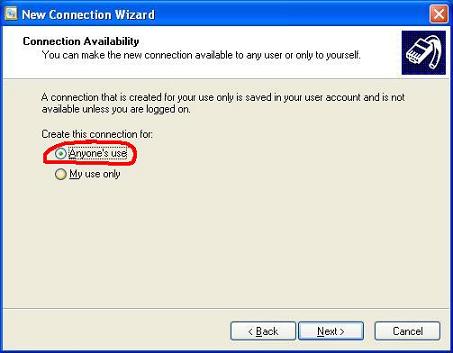
The following window may not always appear. If it does, select Anyone's use and click Next. Otherwise, skip to the next step.
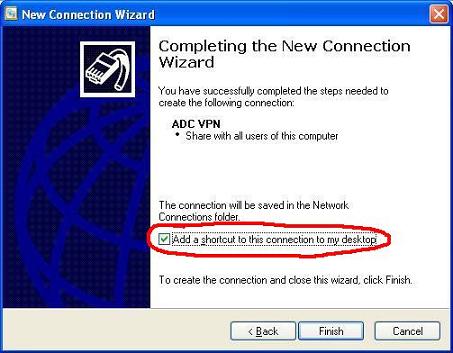
Make sure Add a shortcut to my desktop is checked. Click Finish.
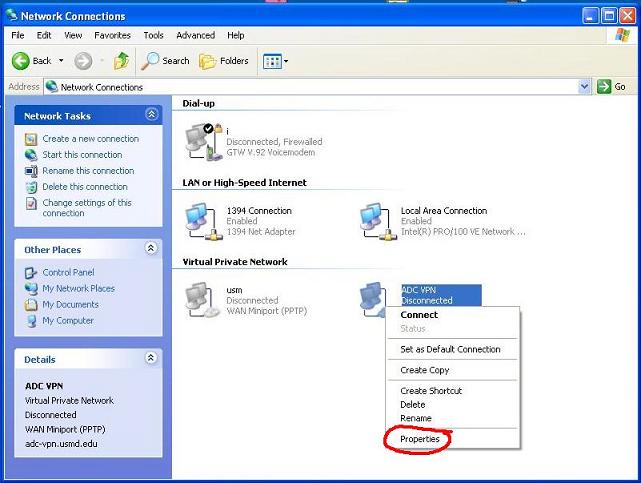
Click on Network Connections.
Right click on ADC VPN and click Properties.
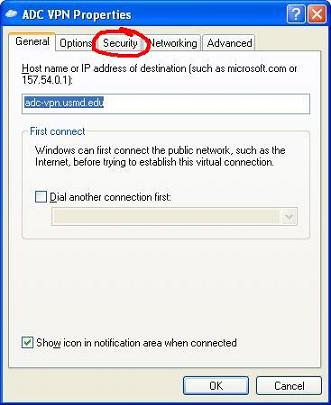
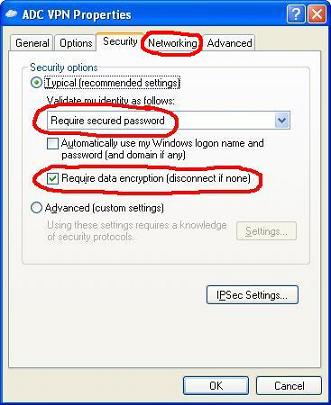
Click on the Security tab.
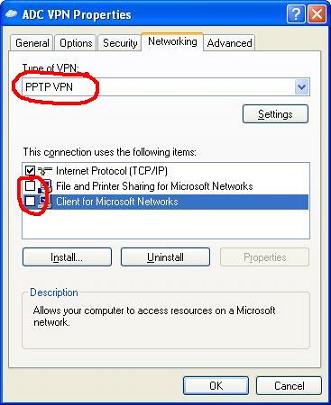
Make sure that Require secured password and Require data encryption are both selected. Click on the Networking tab. If an error appears saying you do not have access to change the properties, click on OK to close the window.
Change the Type of VPN to PPTP VPN. Uncheck all of the items except Internet Protocol (TCP/IP). If any of the items have a grey check box, leave that box alone.
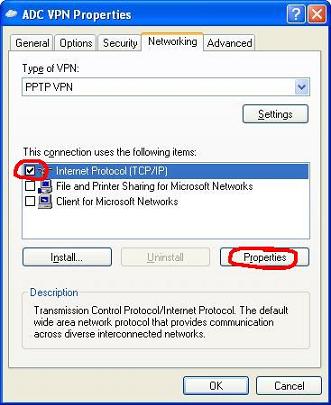
Click on Internet Protocol (TCP/IP) to highlight it, and then click on Properties.
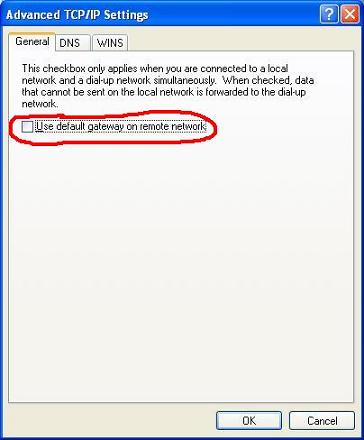
On the next window, click on Advanced.
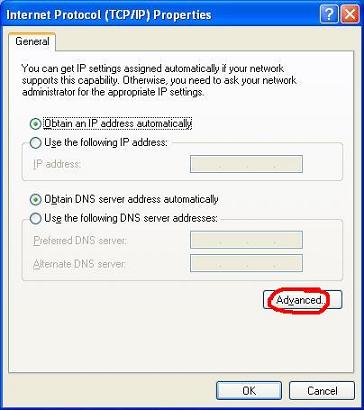
Uncheck Use default gateway on remote network. Click on OK to close this screen, OK to close the TCP/IP screen, and OK to close the ADC VPN Properties screen.
Congratulations! You have now completed setup of the VPN. Before trying the connection, do the steps in the document Setting up RUMBA for ADC VPN.